Morimoto Projector Retrofit
Warning:
This modification requires cutting and modification of the headlight housing.
Do not attempt this modification if you aren't comfortable with wiring, cutting metal, and drilling plastic.
This is a difficult modification.
If you do decide to continue, please read and look at the pictures carefully.
By using this guide, you agree that we are not responsible for any harm you cause yourself and/or your car! Continue at your own risk.
Quick overview of major steps:
Step 0: file out casting debris in bolt holes on projector if needed. Most holes had excess casting debris
Step 1: Drill adapter bracket out, ONLY the holes on the edges, use 13/64" drill bit.
Step 2: Attach adapter bracket. Line up projector inside headlight and mark the areas needing dremeling.
Step 3: Cut projector. I used a dremel with a drill bit. BE CAREFUL.
Remove bottom corner lens housing screw. Shave down bracket bolt, needs to be flat on one side to fit.
Step 4: install, follow instructions provided.
If you are doing any type of HID conversion, this SKBOWE kit is NECESSARY for your HID to work as intended!
This project would not have existed if it weren't for Jacob's SKBOWE PWM filter. He spent many hours researching, developing, doing write-ups and manufacturing the ONLY real Pulse Width modulation (PWM) filter.
The Volvo factory power source for the halogen bulbs "flicker" many times per second. It was designed this way for a reason, but for retrofitting HID's it's a nightmare because it burns out your HID kit very quickly, or worse, burn up your wiper control module.
In laymen's terms, PWM is the equivalent of flicking a light switch on and off and on again extremely fast. These modulations will burn up your HID ballast and bulb because they're fundamentally different than a filament in a halogen bulb.
The SKBOWE is installed between your HID kit and the vehicle. Think of it as a "power reserve", it stores just enough power coming from the car such that the PWM's do not affect your ballast, and your kit sees clean, unmodulated power.
Pictured here is the RETRO-QUIK: BOSCH "E46" BI-XENON kit from The Retrofit Source
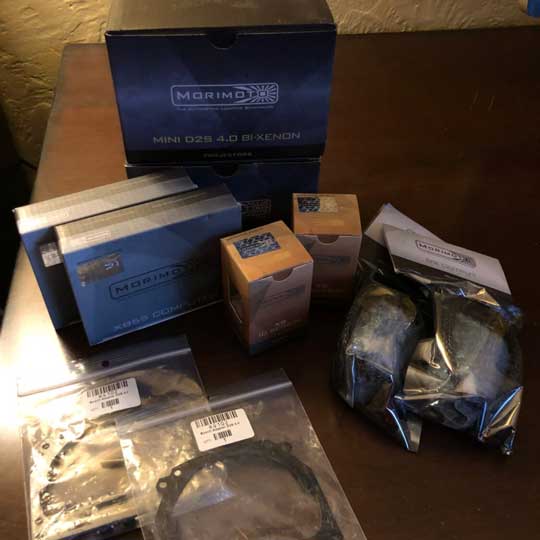
Breakdown of the components which make up this kit:
Projector: Morimoto “mini” 4.0 D2S bi-xenon
HID kit: Morimoto D2S: 6500k XB D2S bulbs /50w XB ballast
RQ hardware projector retro-fit bracket

First thing I did was unbox the projector and admire its beauty. razor sharp curved cutoff shield, Kuria optics clear lens. These are a bi-xenon projector with a mechanical cutoff shield. for use in the standard halogen headlight (like mine), the stock projector is not bi-xenon, meaning when the stalk is pulled back for the brights, only the inner high beam bulb is activated. With bi-xenon, the cutoff shield pivots down to let more light out, in addition to the high beam. I plan to splice into the brights and wire up the bi-xenon functionality, but probably not at first.
Heres a side by side of both the volvo halogen projector and the morimoto:

next, the retro-quik hardware brackets. These fit up perfectly with the headlight shroud mounting points. However, the holes cut in the brackets were a tad small for the existing volvo projector screws. I had to drill them out just a tiny bit.

You can see here how close these two sizes of screws are. The hole that has to be drilled out is only slightly smaller than it needed to be to fit the OE Volvo projector headlight screws.


now I can fit the bracket to the projector, and get it lined up in the housing for a test fit...


oops, see anything wrong with this picture? turns out the projector is a little wide on the edges... heres where the cutting begins

Heres a general sketch of the area that will need some work to fit. Thought about shaving down the inside of the “posts” of the headlight housing which the projectors are supposed to mount too, but that seems a little sketchy. There’s plenty of room on the edge of the projector to grind off a little to clear those posts.

I had to remove more metal than I thought I would have to.


Success! it fits.


Now, test fitting of the bulb, and ignitor. I needed to check if the door on the back of the headlight would close. It's too close for comfort, so I will have to modify it a tiny bit.


The headlight door has a few plastic fins that can be removed to add a little bit of clearance for the D2S ingitor and wires.


Also drilled out a hole for the rubber seal so I can wire up the SKBOWE and ballast outside of the headlight assembly.


It's best to pass the wires through the rubber seal like this, for the cleanest install.


Here's how it looks from the outside. The projector lens protrudes a little more than the factory one.

Finally, time to see how it all will hook up. You can see the ballast and SKBOWE in this configuration.

Here are some shots of the lights in action. SO much better than the factory halogen.


